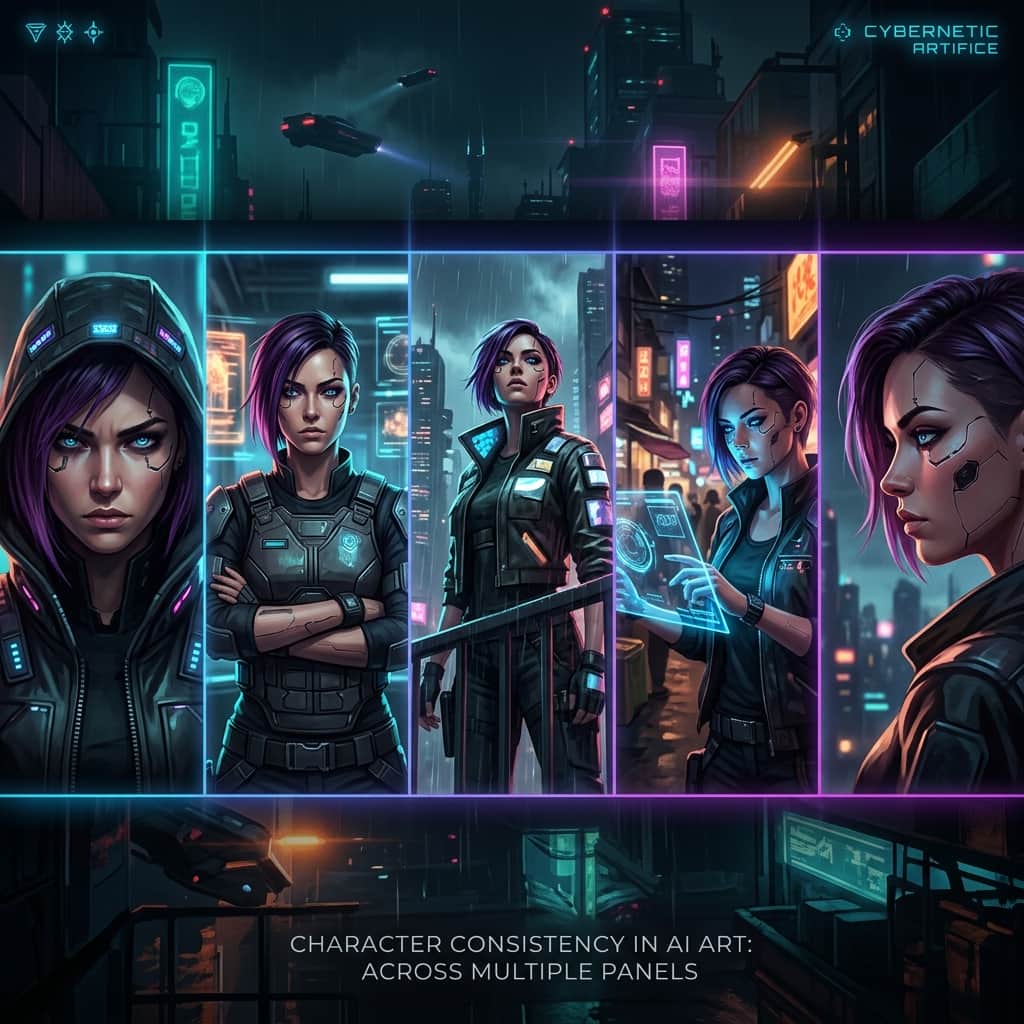
For years, the holy grail of generative AI art has been simple yet frustratingly elusive: character consistency. If you’ve ever tried to write a children’s book, design a comic strip, build a storyboard, or develop cohesive branding assets using tools like Midjourney, you’ve probably run into the exact same wall. You generate a gorgeous image of a character in one scene, but when you try to place that same character in a different environment, they morph into someone else entirely. Their nose changes shape, their hair texture shifts, and their clothes transform as if they’ve undergone a complete makeover between panels.
With the release of Midjourney’s official Character Reference feature (using the --cref parameter), the rules of the game changed completely. This masterclass is designed to help you unlock the full power of character consistency. We will skip the basic definitions and dive straight into the operational parameters, advanced workflows, combining style with characters, multi-turn consistency tricks, and troubleshooting common issues. By the end of this guide, you will have a production-ready framework to keep your subjects looking identical across any pose, camera angle, and narrative setting.
1. The Core Architecture of Character Reference (--cref)
At its core, the Character Reference feature in Midjourney uses a reference image (or multiple reference images) to extract facial structures, key physical attributes, and hair features, and injects them dynamically into a new prompt. Rather than trying to describe a face with a paragraph of adjectives, you show Midjourney a target face and tell it: "Make the subject of this new prompt look like the subject in this reference image."
The basic syntax for utilizing this feature is structured as follows:
/imagine prompt: [Your New Scene Description] --cref [URL of Reference Image] --cw [Weight Value]
To use this parameter successfully, you must adhere to several structural rules within Midjourney:
- URL Accessibility: The URL must lead directly to an online image. The most reliable method is to upload your character mockup to Discord, click the image, open it in a browser, and copy that direct link (ending in
.png,.jpg, or.webp). - Model Compatibility: The
--crefparameter works with Midjourney v6 and Niji v6 models. It will not execute correctly on legacy models (like v5.2 or earlier) without forcing a model mismatch error. - Focus Optimization: The feature is explicitly engineered for human-like characters. While you can attempt to use it on animals, monsters, or objects, the results will fluctuate because the neural network looks for facial landmarks like eyes, eyebrows, nose shapes, and jawlines.
2. Mastering the Character Weight Parameter (--cw)
The --cw (Character Weight) parameter is the throttle that controls how much information Midjourney carries over from your reference image. It accepts values from 0 to 100, with 100 being the default if you omit the parameter.
Understanding how the weight affects the generation is crucial for narrative storytelling, as characters must change clothes and hairstyles depending on the scene.
| Weight (--cw) | Information Retained | Ideal Use Case |
|---|---|---|
| --cw 100 | Face, hair, and original clothing. Midjourney tries to replicate the entire upper body appearance. | Same scene continuation, portrait series, headshots, uniform consistency (e.g., corporate headshots, superhero suits). |
| --cw 50 - 80 | Face and hair texture are locked in, but clothing and accessories begin to blend with text descriptions. | Moderate modifications, matching color schemes, introducing outerwear, changing simple tops. |
| --cw 0 | Only the facial structure, eyes, and expressions are transferred. Hair and clothing are fully controlled by the prompt. | Graphic novels, long narrative stories where characters change clothes daily, custom environments, historical dress changes. |
Let's look at a practical demonstration of how to write prompts using these values. Imagine we have generated our main character, a young archaeologist named Leo, and we have his face reference image URL as https://media.discord/leo_face.png.
Scenario A: Leo in his default outfit (exploring a cave)
/imagine prompt: A young male archaeologist exploring an ancient stone tomb, holding a glowing lantern, dramatic shadows, cinematic lighting --cref https://media.discord/leo_face.png --cw 100 --v 6.0
Result: The character will retain Leo's face, his signature messy brown hair, and his khaki canvas jacket.
Scenario B: Leo attends a gala event (changing clothes)
/imagine prompt: A young man wearing a sleek black tuxedo, standing in a luxurious grand ballroom, holding a glass of champagne, soft warm bokeh lights --cref https://media.discord/leo_face.png --cw 0 --v 6.0
Result: The character will retain Leo's recognizable facial features and eyes, but he will now be wearing a clean tuxedo, and his hair will be styled neatly to match the formal context.
3. Generating the Perfect Reference Anchor Image
The quality of your consistent character outputs is strictly bounded by the quality of your initial "anchor" image. If your anchor image contains complex details, weird lighting, or multiple people, Midjourney will struggle to isolate the face. Follow these rules to generate the ultimate anchor image:
- Neutral Lighting: Avoid heavy shadows, neon lighting, or extreme contrast in the initial image. Flat, diffused daytime lighting works best because the AI can easily translate the skin tones and facial volumes to other environments.
- Clean Background: Generate the character against a solid, neutral, or simple background. A cluttered backdrop will bleed into the reference algorithm, causing strange artifacts to appear behind your character in future generations. Use phrases like
studio portrait, solid grey backgroundorminimalist background. - Clear View of Face: A three-quarter view or direct front-facing portrait is ideal. Avoid references where the character is looking away, has hands covering their face, or is wearing heavy sunglasses.
- Medium Shot: Close-up portraits are okay, but a medium shot (chest-up) gives the network context on both the head shape and shoulder positioning.
Here is an optimized anchor-generation prompt you can use to start your character's journey:
A high-quality studio portrait of a 28-year-old French woman, freckles, emerald eyes, dark auburn wavy hair tied in a loose bun, wearing a plain grey t-shirt, looking directly at the camera, neutral expression, soft natural side lighting, solid off-white background --ar 3:2 --style raw
4. Combining Style (--sref) and Character (--cref)
One of the most powerful workflows for creative professionals is linking character consistency with a specific aesthetic style. In Midjourney, you can run style references (--sref) and character references (--cref) simultaneously. This is essential for graphic novels, animated film pitches, or corporate branding styles.
When you stack these parameters, Midjourney extracts the "who" from the --cref image and the "how" from the --sref image. The syntax is formatted as follows:
/imagine prompt: [Scene description] --cref [Character_URL] --cw [0-100] --sref [Style_URL] --sw [0-1000]
Let's unpack a practical example. Say you have your character anchor image (Character A) and you want to place them inside a retro 1950s comic book. You also have a style image showing thick ink lines and vintage halftone dots (Style B).
Your prompt would look like this:
/imagine prompt: A young woman running down a rainy city street, looking back in fear, dynamic action shot --cref https://media.discord/char_a.jpg --cw 0 --sref https://media.discord/style_b.jpg --sw 800 --ar 16:9
By setting --cw 0, we tell Midjourney: "Don't bring the modern clothes or hair rendering from the portrait. Only bring the face shape." By setting --sw 800, we tell the engine: "Apply the vintage comic ink style heavily to the entire generation." This prevents the final image from looking like a flat photo pasted onto a comic background, blending them together into a single, cohesive art piece.
5. Multi-Angle and Multi-Expression Workflows
While the --cref tool is powerful, feeding it a single image can sometimes lock the character into a specific facial expression. If your anchor image shows the character smiling, Midjourney might generate them smiling even when they are supposed to be crying in a sad scene. To bypass this limitation, you can feed Midjourney multiple character reference URLs separated by a space.
--cref URL_1 URL_2 URL_3
This allows you to create a "Character Sheet" first. A character sheet shows the same subject from different angles and with different emotional states. Here is the step-by-step master workflow to achieve this:
- Generate a Multi-Pose Character Sheet: Write a prompt that forces the AI to output multiple angles of the same character on a single grid. E.g.,
"A character sheet of a young man, showing 4 different angles and expressions: front view smiling, side profile neutral, three-quarter view laughing, front view serious. Clean white background --ar 16:9". - Upscale and Crop (Optional but Recommended): Select the best grid output. If the quality is high, you can upscale the entire grid, crop the individual faces out using any image editor, and upload them separately. Alternatively, you can use the whole grid image directly as the reference, but cropping yields far more precise results.
- Feed Multiple URLs: When prompting, reference both the neutral face and the specific emotional face. For example, if you want your character to look angry:
--cref https://media.discord/neutral_face.png https://media.discord/angry_face.png --cw 0. Midjourney will analyze both images, extract the common facial structures, and apply the angry expression with extreme accuracy.
6. A Step-by-Step Comic Book Walkthrough
To demonstrate this in action, let’s build a 5-panel short story featuring a character named "Aria," a futuristic tech specialist. We will write the exact prompts, set the parameters, and design the narrative progression.
Character Anchor Generation:
First, we generate Aria's anchor portrait. We want a clear shot of her face, short electric-blue hair, and simple lighting.
/imagine prompt: A close-up portrait of a futuristic woman with short electric-blue hair, light brown skin, sharp jawline, green eyes, wearing a simple grey collar shirt, looking forward, studio lighting, dark grey background --ar 3:2 --style raw
Let's assume our chosen image URL is: https://theprompty.com/blogimage/aria_anchor.webp.
PANEL 1: Aria in her lab, analyzing data
Visual Concept: Aria working at a holograph terminal, looking focused. We want to establish her working environment.
/imagine prompt: A female tech specialist standing in a futuristic laboratory, surrounded by glowing blue holographic screens and floating data nodes, focused expression, cinematic side-lighting --cref https://theprompty.com/blogimage/aria_anchor.webp --cw 0 --ar 16:9 --style raw
PANEL 2: Warning sirens activate, transition to urgency
Visual Concept: The room turns red as warning sirens blare. Aria reacts with sudden alarm. We change the lighting and her pose.
/imagine prompt: A female tech specialist in a dark spaceship corridor, alarmed expression, red flashing warning lights reflecting on her face, dynamic low-angle shot, emergency sirens --cref https://theprompty.com/blogimage/aria_anchor.webp --cw 0 --ar 16:9 --style raw
PANEL 3: Running down the narrow escape corridors
Visual Concept: Action shot of Aria sprinting. We keep the style and facial features consistent while allowing the body movement to look dynamic.
/imagine prompt: A female tech specialist running fast down a narrow metal spaceship hallway, looking back over her shoulder in panic, motion blur, dramatic action composition --cref https://theprompty.com/blogimage/aria_anchor.webp --cw 0 --ar 16:9 --style raw
PANEL 4: Reaching the escape pod panel
Visual Concept: Close up of her hands typing codes on a keyboard, with her face visible in profile, sweat on her temple, high tension.
/imagine prompt: A close-up side profile of a female tech specialist, sweat on her forehead, typing desperately on a glowing digital keypad, dark shadows, tense atmosphere --cref https://theprompty.com/blogimage/aria_anchor.webp --cw 0 --ar 16:9 --style raw
PANEL 5: Safety in space, looking out the window
Visual Concept: Aria inside the escape pod, looking out the portal window at the planet below, relieved expression, soft interior lighting.
/imagine prompt: A female tech specialist sitting inside a cozy escape pod cabin, looking out a round window at a glowing blue planet, relieved smile, soft warm ambient lighting --cref https://theprompty.com/blogimage/aria_anchor.webp --cw 0 --ar 16:9 --style raw
Notice that in panels 1 through 5, we continuously used --cw 0. This is because we wanted Aria to wear appropriate clothing for each scene (her flight suit, escape gear, etc.) rather than forcing the simple grey collar shirt from her original anchor image. Her electric-blue hair and sharp facial structure will carry over, maintaining the story's visual continuity.
7. Expert Troubleshooting and Optimization
Even with the best prompts, Midjourney’s neural networks will sometimes deliver unexpected results. Here are the most common character consistency bugs and how to resolve them like a professional prompter:
A. Facial Distortions and Artifacts
The Issue: The character's face looks slightly scrambled, has asymmetrical eyes, or double eyebrows.
The Fix: This usually happens when the prompt text is overly crowded with descriptive text that conflicts with the reference image. Simplify your prompt text. If that doesn't work, lower the weight to --cw 80 or try running the prompt at a lower stylized value (e.g., --stylize 100 instead of 250). You can also use the Vary Region (Inpainting) tool to select the face and re-run only that specific area with the --cref parameter active.
B. Clothing "Bleeding"
The Issue: You set --cw 0 and asked for a character to wear a red hoodie, but the system keeps generating the blue polo shirt from the anchor photo.
The Fix: Midjourney is heavily biased towards the colors present in the reference image. To break this link, you must write negative descriptions or use strong styling cues. Try adding the material and color repeatedly in your prompt (e.g., wearing a bright red thick cotton hoodie, solid crimson color fabric) and explicitly declare what to avoid using the negative prompting parameter (e.g., --no blue shirt, polo, collar).
C. Gender or Ethnic Shifting
The Issue: When you change environments or styles, the character shifts their gender expression or ethnicity to match the stereotypes of the new style.
The Fix: Always describe the gender and key ethnic attributes of your character in the text prompt, even when using --cref. Don't assume the reference image does all the work. If your character is an East Asian man, write "An East Asian man sitting in a Parisian cafe...", rather than just "A man sitting in a Parisian cafe...". This anchors the latent space of the neural net to the correct demographics.
D. The "Same Face" Cartoon Effect
The Issue: The character looks like a 3D cartoon head poorly photoshopped onto a realistic photo body.
The Fix: This occurs when there is a massive style mismatch between the anchor image and the target prompt. If your anchor is a vector illustration and you try to prompt a cinematic photo, the blending will look uncanny. Match your styles first. If you want photo outputs, make sure your anchor is a clean photo. If you want comic book panels, make sure your anchor is drawn in that exact comic book style.
8. Reference Library: 5 Go-To Prompting Recipes
Here are five production-ready prompting recipes for consistent characters in different visual formats. Swap out the reference URL with your own to get started.
Recipe 1: Clean Anime / Manga Style
/imagine prompt: A young anime protagonist boy holding a glowing sword, standing atop a windy mountain peak, dynamic cel-shaded art style, vibrant colors --cref https://example.com/anime_char.jpg --cw 0 --ar 16:9 --niji 6
Recipe 2: Cinematic Photorealism
/imagine prompt: A medium shot of a man wearing a brown leather trench coat standing under neon signs in rain-slicked Tokyo streets, reflections, photorealistic, shot on 35mm lens --cref https://example.com/man_face.jpg --cw 30 --ar 16:9 --style raw --v 6.0
Recipe 3: Flat Vector Illustration (Corporate)
/imagine prompt: A vector illustration of a female designer sitting at a desk typing on a laptop, flat design, corporate Memphis aesthetic, pastel colors, clean geometric lines --cref https://example.com/designer_face.jpg --cw 100 --ar 4:3 --v 6.0
Recipe 4: Whimsical Children's Book Watercolor
/imagine prompt: A cute little girl wearing a yellow raincoat splashing in a puddle, smiling, soft watercolor wash, hand-drawn pencil details, pastel nursery art style --cref https://example.com/girl_face.jpg --cw 0 --ar 1:1 --v 6.0
Recipe 5: High-End 3D Character Render (Pixar Vibe)
/imagine prompt: A 3D clay render of a friendly male mechanic holding a wrench, smiling warmly, Pixar style, ray-traced reflections, soft clay textures --cref https://example.com/mechanic_face.jpg --cw 80 --ar 1:1 --v 6.0
Conclusion: Iteration is Key
Maintaining character consistency in Midjourney is not a single-step action; it is a collaborative process between your textual guidance and the algorithm's visual references. Do not be discouraged if your first roll isn't perfect. Use the tools at your disposal—adjust the --cw value, modify your text keywords, use inpainting for minor touch-ups, and constantly curate your anchor images. With a structured approach and these advanced techniques, you can confidently build immersive, character-driven visual narratives that captivate your audience.