Few things spark as much domestic debate and decision paralysis as a home renovation project. You sit down with your partner surrounded by hundreds of tiny tile samples, paint chips, and cabinet brochures, trying to answer a deceptively simple question: "What will it actually look like when it's done?" If you are a busy parent, you don't have the time to master complex CAD modeling tools, and hiring an interior designer just to draw up a basic concept sketch can cost thousands of dollars before you've even bought a single box of nails.
This is where Midjourney changes everything for everyday homeowners. Rather than trying to mentally paste together cabinet colors, countertop patterns, and pendant lights, you can write a short text description and generate photorealistic, studio-quality interior design renders in less than a minute. Whether you want to see if dark green cabinets clash with brass hardware or if a Scandinavian wood vanity fits with terrazzo tile, Midjourney lets you explore options instantly. In this guide, we'll break down the exact prompting blueprints to visualize your dream kitchen and bathroom renovations, giving you professional mockup images to show your contractor.
1. The Anatomy of an Interior Design Prompt
To get clean, professional-looking interior designs from Midjourney, your prompts need to describe four key areas: Layout & Structure, Material System, Style Aesthetic, and Photography Details. If you skip details, Midjourney will fill in the blanks, often placing strange decor objects or unrealistic lighting into the scene.
Here is the standard formula for an interior design prompt in Midjourney:
/imagine prompt: A wide-angle interior design photograph of a [Room Type], [Layout Details], [Cabinets, Counters & Vanities], [Tiling & Backsplash], [Hardware & Lighting], [Style Name], designed by [Architect/Designer Name], natural soft morning lighting, shot on 35mm lens, photorealistic --ar 16:9 --style raw
Let's unpack each component of this structure:
- Layout Details: Describe the focus of the shot. E.g., "centered shot of kitchen island," "side view of bathroom vanity," or "wide-angle view looking towards the backyard window."
- Materials & Texture: Be specific about surfaces. Use descriptive phrases like "polished white Carrara quartz countertops," "matte sage green shaker cabinets," "zellige glazed white square tiles," or "light oak herringbone wood floors."
- Style Names: Standardize the vibe. Terms like "Scandinavian minimalist," "modern organic," or "industrial farmhouse" guide the neural net to choose matching chairs, faucets, and decorations. For highly customized architectural layouts, designers can check out our advanced SDXL Architectural and Interior Design Workflows.
- Photography Settings: Using photography terms like "wide-angle interior photograph," "soft natural morning light," and "shot on 35mm lens" prevents the output from looking like a flat 3D cartoon render, forcing Midjourney to mimic real magazine-quality photos.
2. Curating Your Aesthetic Style Guide
Before you start prompting, it helps to understand how Midjourney interprets different popular design aesthetics. The table below outlines the core keywords, color palettes, and materials that generate clean, cohesive room makeovers.
| Aesthetic Vibe | Primary Materials | Color Palette |
|---|---|---|
| Scandinavian Minimalist | Light oak wood, matte white plaster walls, simple flat-panel cabinets, clean black steel accents. | Cream, warm beige, soft grey, light wood tones, black accents. |
| Modern Organic | Travertine stone, textured boucle fabrics, fluted oak vanities, brushed brass hardware, clay plaster. | Oatmeal, olive green, warm taupe, charcoal, brass gold. |
| Modern Farmhouse | Reclaimed barn wood beams, white shiplap walls, fireclay apron-front sink, black iron cup handles. | Chalky white, charcoal grey, natural weathered wood, matte black. |
| Moody Transitional | Dark stained walnut wood, heavily veined Calacatta marble, brass reeded details, velvet upholstery. | Forest green, navy blue, espresso, brushed gold, warm white. |
By naming one of these styles, you instantly establish a design theme for your prompt, reducing the risk of cluttered, confusing, or mismatched furniture selections in your final render.
3. Step-by-Step Kitchen Renovation Workflow
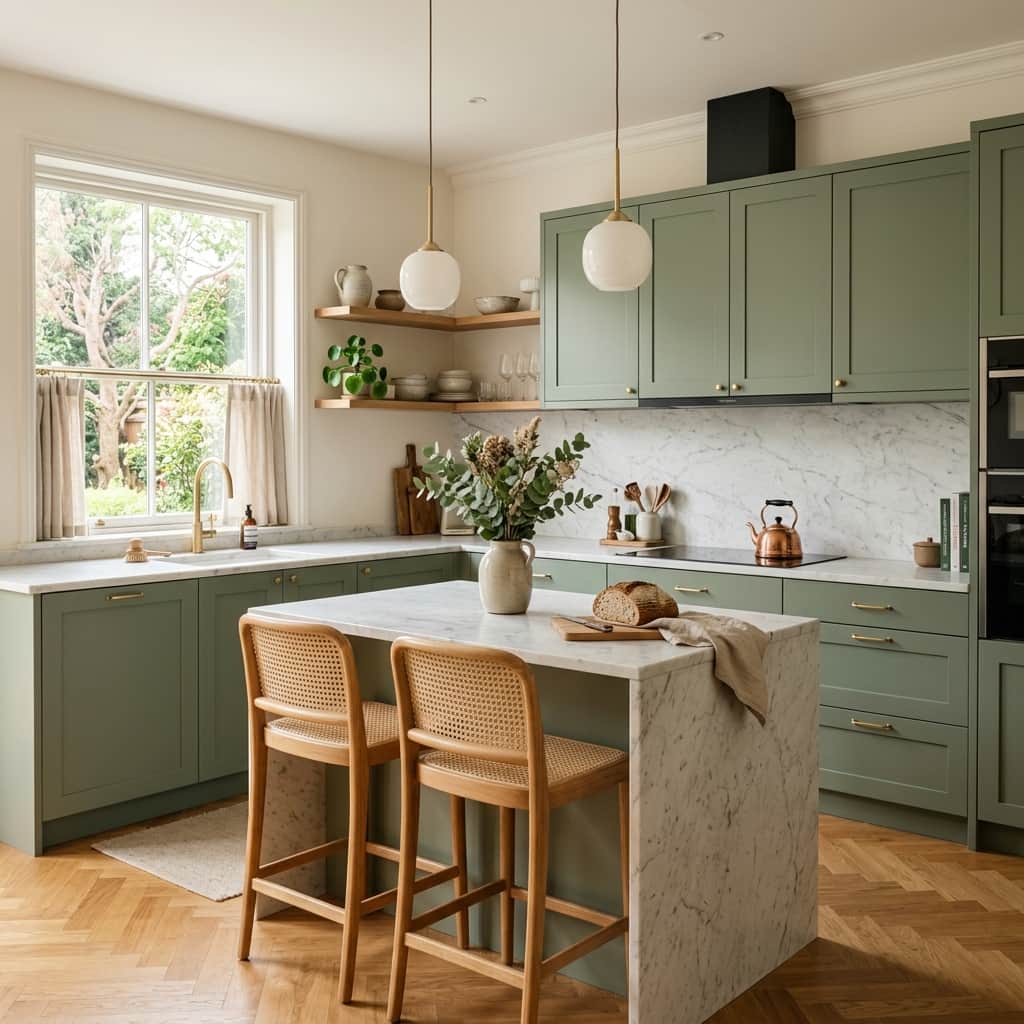
Let's walk through a practical scenario. Suppose you want to remodel your kitchen. You have a medium-sized space with a central island. You love the look of dark cabinets but are worried they will make the space look too dark. You want to see how dark green cabinets look paired with warm wood floors and bright marble countertops.
Here are the exact prompts to test this design scheme:
Prompt 1: Dark Green Shaker Cabinets with Brass Hardware
/imagine prompt: A wide-angle interior design photograph of a modern organic kitchen, centered on a large island with white marble countertop, matte forest green shaker cabinets, brushed brass handles, white plaster hood over a brass range, light oak wood floors, soft natural light coming from a side window, architectural digest style, clean design --ar 16:9 --style raw --v 6.0
Run this prompt. If the green feels too dark, you can instantly modify the cabinet color parameter to find a lighter alternative, like sage green or warm beige:
Prompt 2: Sage Green Cabinets (Lighter Option)
/imagine prompt: A wide-angle interior design photograph of a Scandinavian style kitchen, sage green flat-panel cabinets, white quartz countertops, light maple wood accent island, white vertical stack tile backsplash, modern black pendant lights, light maple wood floors, soft morning sun --ar 16:9 --style raw --v 6.0
Compare both options. You can print out these generated concepts to begin building a physical mood board. To see how to turn these digital designs into high-quality prints for framing and styling, read our step-by-step article on Creating Custom Framed Art for Your Home Using AI.
4. Step-by-Step Bathroom Renovation Workflow
Bathroom renovations are notoriously tricky because the spaces are small, and tiling choices dictate the entire aesthetic. Let's design a cozy, spa-like master bathroom oasis featuring a double vanity, vertical tiles, and a freestanding tub.
Prompt 1: The Modern Organic Master Bath Oasis
/imagine prompt: A wide-angle interior design photograph of a luxurious master bathroom, showing a freestanding soaking tub in front of a window with white linen curtains, a double vanity made of fluted oak wood, round mirror with thin brass frame, matte white zellige tile backsplash, brass fixtures, travertine stone floor tiles, lush potted eucalyptus plant in corner, soft warm lighting, spa-like atmosphere --ar 16:9 --style raw --v 6.0
If you want a bolder, more graphic style, you can swap out the fluted oak and zellige tiles for terrazzo and black hardware:
Prompt 2: Graphic Terrazzo & Black Hardware Remodel
/imagine prompt: A medium shot of a bathroom vanity area, round black metal-framed mirror, custom terrazzo sink basin with colorful stone flecks, matte black faucet, background wall covered in grey concrete plaster, minimalist styling, bright daylight, cinematic photograph --ar 16:9 --style raw --v 6.0
These renders allow you to make critical decisions (like choosing brass vs. black hardware) before you purchase expensive plumbing fixtures and tiles.
5. Communicating Your Designs to Contractors
One of the greatest benefits of generating these renders is bridge-building. Contractors are excellent at building, but they are not mind-readers. Telling a contractor "I want a rustic wood vanity" can mean five different things. Handing them a high-resolution, photorealistic Midjourney printout of a "fluted oak double vanity with brushed brass plumbing fixtures" eliminates all miscommunication.
Here is how to use these images effectively on your project:
- Build a Digital Folder: Save your best renders in a shared folder (like Google Drive or Dropbox) labeled by room (e.g., "Kitchen Concepts", "Powder Room Ideas").
- Print the Designs: Don't just show the images on a small phone screen. Print them out on high-quality paper. If you need inspiration on styling and color coordinating prints, check out our guide on Decorating Your Digital Space for layout ideas.
- Compare with Actual Samples: Hold your printed renders next to real physical material samples (tile, cabinetry finishes, wood planks) at the design center. This allows you to verify that the physical textures match the AI-generated aesthetic you fell in love with.
6. Expert Tips for Interior Design Prompting
To avoid common mistakes and get the absolute best results from Midjourney, keep these expert prompting rules in mind:
- Avoid the word "perfect": Do not use empty buzzwords like "perfect kitchen," "amazing bathroom," or "beautiful design." Instead, describe the physical attributes: "uncluttered space," "minimalist decor," or "clean lines."
- Watch the Lighting: Always define your lighting. "Morning sunlight," "soft diffused evening dusk," or "warm architectural spotlighting" changes the mood of the materials. Without this, Midjourney might apply flat, industrial office lighting.
- Use Negatives (--no): If Midjourney keeps placing unwanted clutter (like toaster ovens, random soap dispensers, or cheap decorative items) on your countertops, use the negative prompt parameter to clean the surfaces. E.g., add
--no clutter, toaster, plates, random decorationsto the end of your prompt.
Conclusion: Design with Confidence
Remodeling your home is a major financial and emotional investment. Decision paralysis is natural, but you don't have to navigate the planning phase in the dark. By using Midjourney to visualize your kitchen cabinet colors, layout details, tile formats, and bathroom fixtures, you can test-drive your ideas before spending a single dollar on materials. Take these prompt templates, customize the colors to match your taste, and start building your dream space with confidence. Happy designing!